
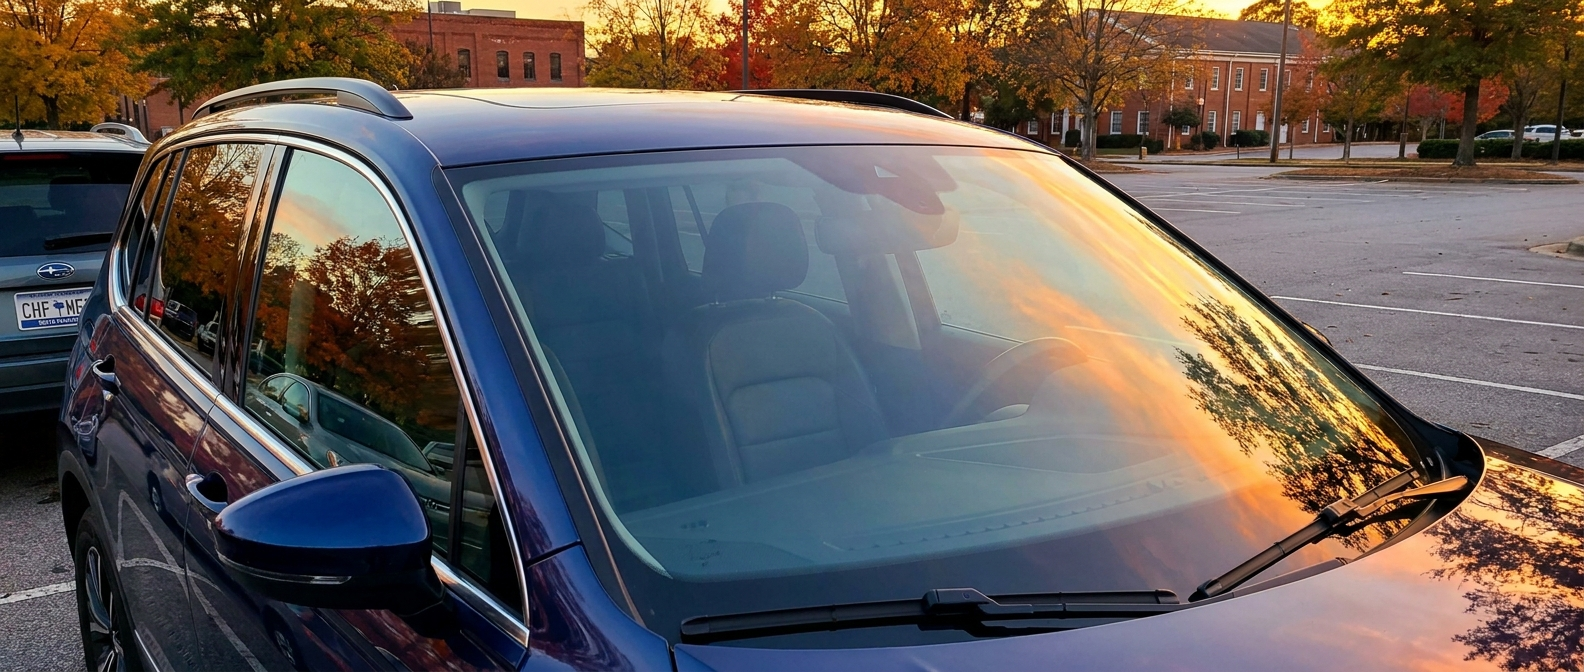
October sunsets in Greenville are arriving earlier every day, and they're landing squarely on your eyeline during the evening commute. Right now, sunset falls around 7:05 PM EDT. By the time November 1 rolls around and clocks fall back, it'll arrive before 6 PM. On the drive home down I-385, a commute that used to finish in full daylight now ends with the sun sitting just above the hood, and whatever haze, mineral film, or wiper smear is on your glass becomes a wall of white light.
The fix isn't "clean your windshield." We've seen plenty of cars come through our Steve White Volkswagen service center with glass that looks perfectly fine in a covered garage and turns nearly opaque in direct low-angle sun. The actual fix is understanding what's on your glass and hitting it in the right order, because each of these five steps does something the one before it can't.
Start with step one, the step that's easiest to overlook.
The Ranked Approach: From Simple to Irreversible
Not all glass problems respond to the same solution, so the smart move is to rank these interventions by how much contamination has built up and work them in order, because a sealant laid over etched glass locks in the damage while a clay bar over simple film is wasted effort. Do them from the top down.
| Rank | Step | Best For | What It Removes |
|---|---|---|---|
| 1 | Dedicated interior glass clean | Interior haze and off-gassing film | Plasticizer residue, breath moisture, HVAC oil film |
| 2 | Ammonia-free exterior glass cleaner | Fresh water spots and light road film | Loose mineral deposits, surface grime |
| 3 | Clay bar treatment | Bonded exterior contaminants | Mineral crust sitting above the glass surface |
| 4 | Cerium oxide glass polish | Etched water spots and wiper haze arcs | Microscopic surface damage that cleaners can't reach |
| 5 | Hydrophobic glass sealant | Prevention after steps 1-4 | Creates a barrier so future water beads and rolls off |
Step 1 Is the Interior, Not the Windshield You Think You Already Cleaned
When a car comes in with exterior glass that's reasonably clean and a driver who still complains that something feels off at sunset, the culprit is usually the inside of the windshield, not the outer face you think you already cleaned. The inner surface is where the haze hides.
Your interior glass collects a film from two sources. The cabin's plastics and vinyl off-gas as they heat and cool through summer, leaving a thin oily residue that clings to the inner surface of the glass. Add the oil mist your HVAC system blows when you run the defroster. Heat pulls suspended traffic film and oil vapor through the vents and lays it right on the inner screen. The result is a translucent haze that scatters low-angle light into a flat glare. You won't catch it at noon. At 6:45 PM it's blinding.
Clean the interior glass first, every time, before you touch the outside. Use an ammonia-free automotive glass cleaner on a waffle-weave microfiber towel, and skip the household glass cleaner, which can damage tinted windows. Wipe in vertical strokes from top to bottom. Do it twice. Then do the exterior.
Tiguan owners with the standard panoramic sunroof have two extra glass panels worth of interior surface to cover. Don't skip them.
Step 2: Exterior Cleaner, but Work in the Shade, Not the Driveway
Working the exterior cleaner the right way matters as much as the product you pick, because cleaning automotive glass in direct sunlight evaporates the cleaner off the surface before you've fully wiped it, leaving behind exactly the streak pattern you were trying to remove. It sounds obvious. It isn't. On a 70-degree October afternoon in Greenville, the glass is still warm enough to cause real problems.
Move the car into shade. Your garage, a covered spot, anywhere that pulls it off direct sun. Apply the cleaner to your towel first rather than spraying it straight on the glass. Work one pane at a time and dry it immediately. Then crouch beside the car at an angle to the glass and look across the surface in raking light, the inspection step a lot of guides skip. Haze and rings that hide straight-on show up clearly at a low angle. That angled look tells you whether step 2 finished the job or whether you need step 3.
Step 3: Clay Bar. For What the Cleaner Left Behind
Clay comes in when mineral-heavy water (from sprinklers, car washes, summer rain on hot glass) evaporates on your windshield and leaves calcium and magnesium deposits sitting above the surface, the stage detailers call Stage 1 contamination, and a clay bar with lubricant shears them off mechanically. The glass will feel noticeably smoother after, almost slick to the touch.
Clay handles what sits on top of the glass. It won't touch what's already bonded underneath.
Clay sometimes improves a badly spotted windshield by half and then stops. If you clay the glass and the haze is better but not gone, you've crossed into Stage 2 territory, and that's where step 4 comes in.
Quick check before you clay: Run a clean fingertip across a dry section of glass. If it feels rough or gritty, there are bonded deposits present. If it feels glassy-smooth, the issue is likely film rather than mineral buildup, and cleaning may be all you need.
Step 4 Is the One People Don't Know Exists
A cerium oxide glass polish physically removes a micro-thin layer of damaged glass surface, eliminating etched water spots and wiper haze arcs that no cleaner or clay bar can reach.
Etched mineral deposits, Stage 2 in detailing terminology, form when spots sit under prolonged heat and sunlight, letting the mineral acids crater microscopic pits into the silica surface of the glass. At that stage no spray cleaner dissolves them, because the damage is physical, carved into the surface. The fix is mechanical. Cerium oxide, a rare-earth compound, reacts chemically with the glass surface and abrades the damaged layer at the same time.
The same compound removes the haze arcs that worn wiper blades leave behind. Those arcs are especially brutal in fall low-angle light because they run in exactly the arc the sun travels across your windshield.
One caution worth taking seriously. Machine polishing with cerium oxide on laminated automotive glass carries real risk if you dwell in one spot too long. Heat and pressure concentrated on glass already under tension can introduce optical distortion, and that's a bigger problem than water spots. Hand application with a damp felt pad is safer for someone doing this at home. If the etching is significant, bring this job to a professional.
Our service team can assess whether the glass has reached the point where polishing is the right call or where replacement is the more honest answer.
Schedule a Glass Inspection This Fall
Step 5 Protects the Work You Just Did
After cleaning, claying, or polishing, a hydrophobic glass sealant bonds a water-repelling layer to the glass so future rain, mineral water, and road spray bead up and roll off rather than sitting on the surface and evaporating into new deposits. Less contact time means fewer minerals bonding. It won't make the glass immune, but it meaningfully slows the cycle that built the problem in the first place.
Apply it to a cool, clean, dry surface, out of direct sun. A single thin coat is enough. Let it cure before you drive through rain.
While you're at it, check the wiper blades. Most manufacturers recommend replacing them every six to twelve months, and blades that have ridden through a South Carolina summer of UV, heat, and ozone are often at the end of that window right now. A deteriorating blade edge doesn't just streak. It engraves a faint arc into your sealant-fresh glass on the first rainy morning, and that arc is the first thing low-angle sun finds.
Our Jetta and Atlas service intervals include a wiper blade check, and swapping a set takes about 90 seconds. If you haven't done it since spring, October is the right time.
Buying caution: Hydrophobic coatings sold for home use vary widely in durability. Products that require a heat cure generally outlast spray-on sealants by a wide margin, but they are also less forgiving of application on glass that wasn't fully decontaminated first. Do step 4 before step 5 whenever there's visible etching, a sealant on top of damaged glass locks nothing in place.
Categories:
Social